utensi.com ™ - functional and beautiful handcrafted utensils

  • Home
  • Shop
  • Warranty
  • About
  • Blog
  • Contact
  • CART

Bath Bomb Recipe – Cheerful Citrus Fizzy Bath Bombs

September 17, 2018 By Andrea @ utensi Leave a Comment

DIY bath bombs can be a big hit for a fun DIY project with your kids or friends. Most people enjoy using the fun little fizzers in their baths. But, they can be expensive if you buy them at a specialty bath store or online.

Many of the store-bought bath bombs also use toxic fragrances and perfumes. Learning how to make bath bombs easy is a much better, healthier solution. Not to mention, you will save a bundle since the store-bought bath bombs can also be pricey!

The oils used in this recipe were chosen because of the happy effect citrus has when we smell it. All citrus oils are great for cleansing, calming and have the cheerful result for our bodies so putting a couple of them together makes for a great result for a bath product.

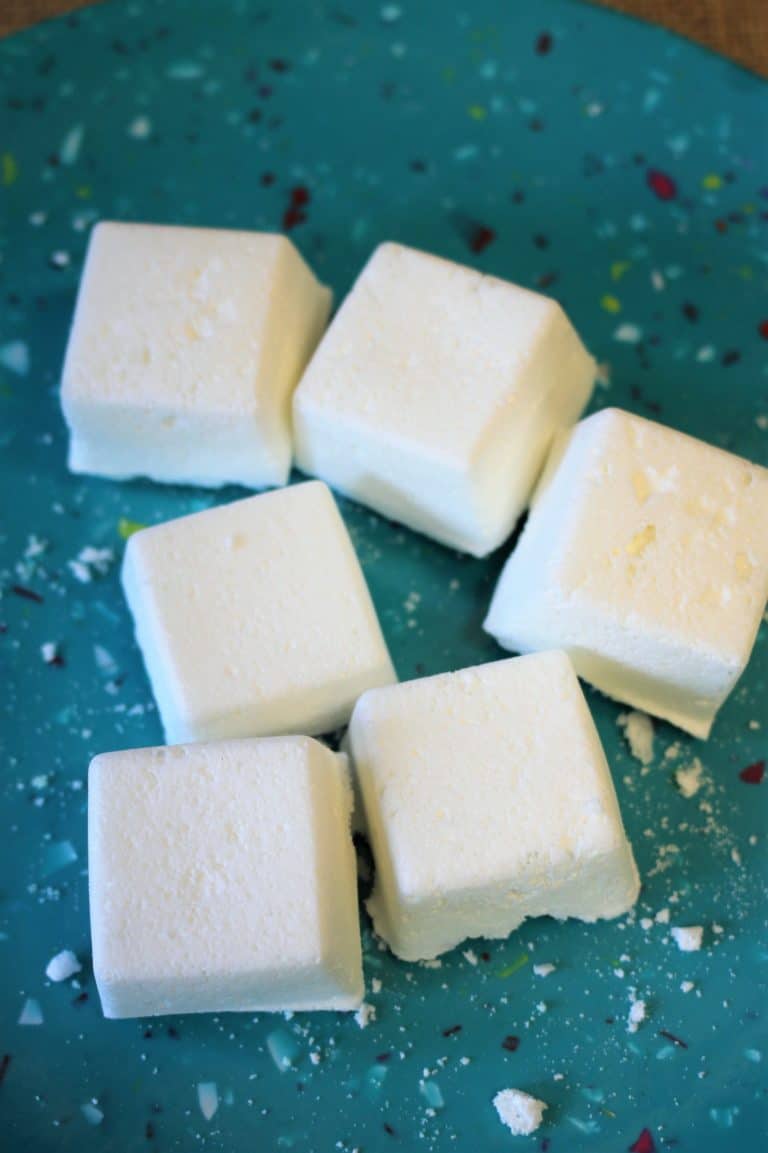
This recipe will make at least one to two trays of the smaller sized ice cube style trays.

Bath Bomb Recipe Ingredients

  • 1 cup, Baking Soda
  • ½ cup, Citric Acid
  • 6 drops, Bergamot Essential Oil (here)
  • 8 drops, Tangerine Essential Oil (here)
  • 4 drops, Grapefruit Essential Oil (here)
  • Witch Hazel
  • Cosmetic Grade Mica Powder or Food Coloring (optional)
  • Silicone Mold

Bath Bomb Recipe Directions

Start off by putting the witch hazel into a spray bottle so that it’s ready when you need it. You won’t use a whole lot of it, but it is hard to say exactly how much.

  1. Measure out the baking soda and place into a medium sized mixing bowl. Now, using a rubber spatula or the back of a spoon, make sure to remove any lumps by mashing them down.
  2. Next, do the same thing with the citric acid and add it to the baking soda. Mix together thoroughly. I like to wear a little mask when mixing the citric acid.

  3. Add in the essential oils. I have found it best to add all oils to a glass container first then slowly add to your mixture. Use a whisk or spoon to help mix them into the whole mixture and break up any clumps.
  4. Put on the gloves and grab the bottle of witch hazel. Slowly spray the mixture a few sprays at a time.  Work the witch hazel into the mixture with your hands. You want it to be a consistent, damp texture, but not overly wet.  If it gets too wet now, it will start to react and puff up, which you want for the bath not for the recipe.
  5. If you are adding any coloring, this is the time for that also. Use a small amount of color and work it in until it is all over the whole mixture evenly.
  6. Keep mixing and spraying the mixture until it starts to stick together and is no longer powdery. You can test if to see if it will clump together in the palm of your hand when you squeeze it. If it falls apart and still seems dry, add more witch hazel.
  7. Once the mixture sticks together and the color is mixed in well, add the mixture to the molds.
  8. Take a small amount in your hand, and press it down into each mold, flattening it out until it is full. Wipe off the excess from the top of the mold so it is flat on the top side. Repeat this until you’ve used all of the mixture up.
  9. Let the bath bombs dry for at least 15-20 minutes. If you try to remove them too early, they may crumble.
  10. Once dry, flip over the mold on to a large plate or baking sheet. Pick up one corner to test and see if any are coming loose. Sometimes they will fall right out but if not, try to gently push them out one at a time.
  11. Last part to this is to leave them to sit at least an hour or more to completely dry.

Once you feel they are totally dry and hardened, go ahead and choose your way of storing them and add a label if you like. Glass jars work great, but if you don’t want glass near the tub for your kids, you can even use a bag.

When you’re ready to enjoy the fruits of your labor, add one or two at a time to your bath water, depending on the size of them. If they are smaller, you will probably want more like 4 or 5. Enjoy the relaxation of the essential oils and the fizzy colors in the bath!

wooden measuring spoons long handles utensi

Use our long handle measuring spoons to measure and stir the liquids in this recipe.

Homemade Bath Bombs

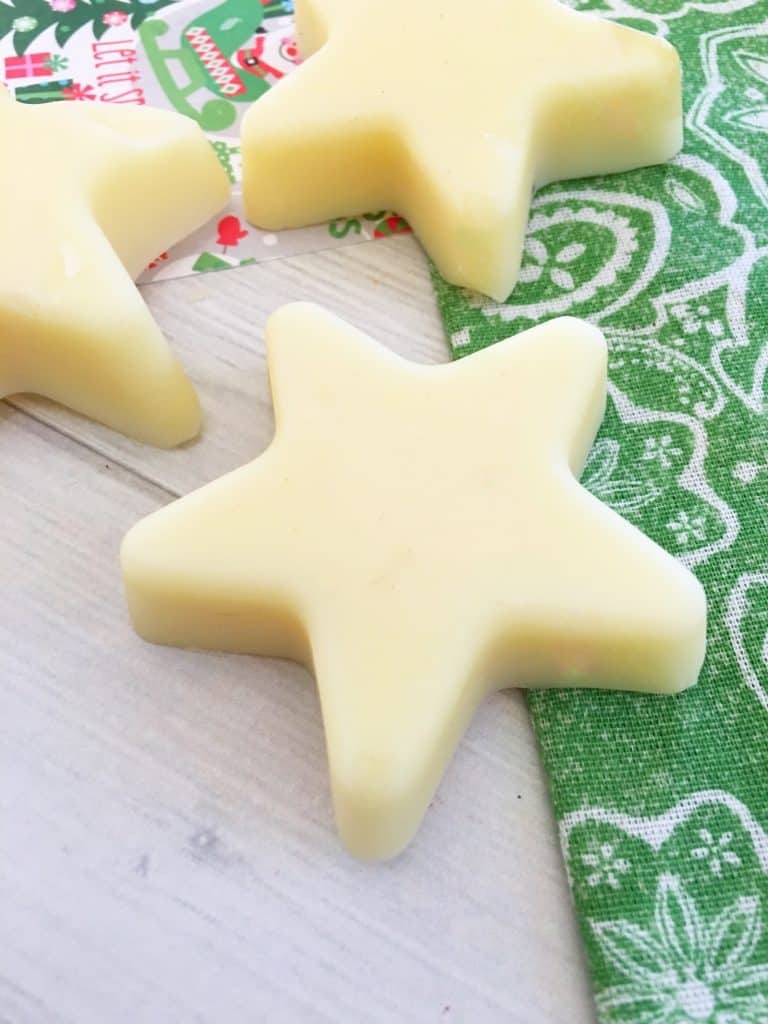
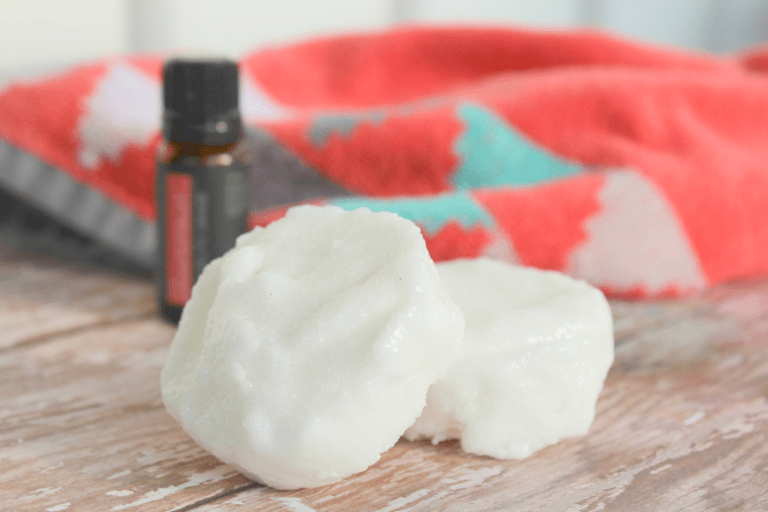
Homemade Shower Melts Recipe

Homemade Bath Bombs like LUSH

Filed Under: Recipes Tagged With: DIY Gifts, Personal Care Recipes

How to Make Soap – Fresh Woods Shea Butter

September 4, 2018 By Andrea @ utensi Leave a Comment

Easy Homemade Soap recipe if you want to learn how to make soap at home! This melt and pour soap recipe is simple and can be made fast! via @utensibrand

I used to think the soap making process was really complicated. It wasn’t until someone gave me some soap base as a gift that I even attempted making my own. If you use a good base, and just add a few ingredients, you can make soap at home easily!

I always use the silicone molds to make mine because they come out great each time. I have tried other containers with zero success so find what works for you. The soap base can be purchased online or in your local craft store. Either a shea butter or goat’s milk base will work fine for any homemade soap recipe.

Then you just need to add a little bit of a nourishing oil that will help along the moisturizing part and some essential oils. Be sure they are pure ones if you are concerned about making this soap toxin-free.

For this recipe, I have combined Balsam Fir, Cedarwood and Spearmint. This creates an uplifting combination of the mint and the woodsy scents that is great for the skin, and is also a good scent for men and women both. The process works with any scents so when you get comfortable start experimenting with your own scents and blends.

Soap Ingredients

  • 8-12 oz, Shea Butter Soap Base
  • 1 tsp, Sweet Almond Oil
  • 4 drops, Cedarwood Essential Oil
  • 6 drops, Spearmint Essential Oil
  • 6 drops, Balsam Fir Essential Oil
  • Silicone Mold (an ice cub tray would also work)

How to Make Soap

  1. Chop up the soap base into smaller squares. Depending on your mold, the amount of soap can vary. I will chop up enough to fit in the mold (as pictured above) so I have an idea of how much is needed since. I still add another 2 or 3 squares of it to ensure it will be enough once it’s melted.
  2. Place the soap pieces into a glass measuring cup or mixing bowl. Microwave for about 30 seconds. They will be about half-melted, so take a rubber spatula and turn them and stir, then place back into the microwave again for 30 more seconds.
  3. Measure out your sweet almond oil and add it to that melted soap when it comes out. Stir well and then microwave for 20 seconds.
  4. At this point there should be no lumps in the soap and you will likely need to scrape some soap off the sides of the bowl to get it to melt back in.
  5. Now you can add in your essential oils to the mixture. If the soap is still somewhat solid, microwave again for 10-15 seconds. As you start to add the essential oils, the soap will solidify some. Be sure to get all the soap mixture involved, scraping the sides and getting down in the bottom of the bowl too.
  6. Microwave all ingredients one last time for 20 seconds. If the soap looks all smooth, pour smoothly and slowly into the molds. They should be filled up as far as you can go, to just below the top edge if you have enough soap base to do so. If it happens to solidify too much, microwave again for a few seconds and then pour again.
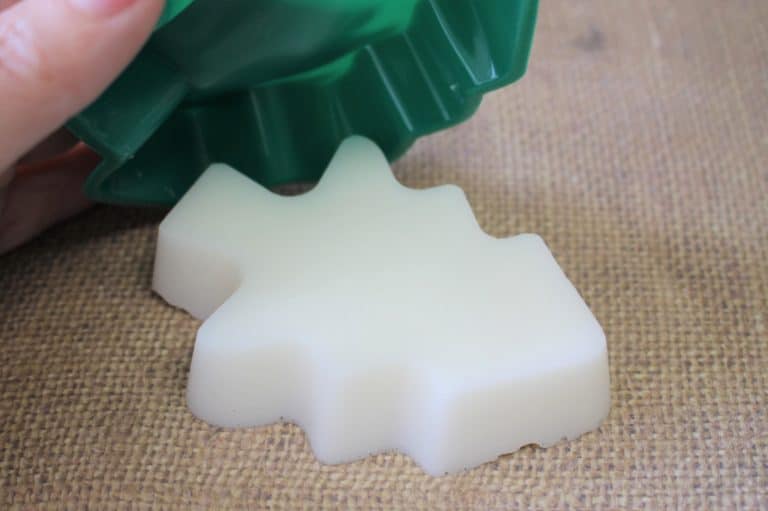
  7. Place the soaps on the counter at room temperature until they are cooled. To try them out and see if they are ready, feel the center of the mold. If it is still warm, give them a bit longer. If not, go ahead and carefully peel the mold from the top corner and the soap should easily pop out of the mold for you.

So, you are a rockstar and now know how to make soap from scratch! I hope you agree that this recipe is fairly quick and easy. It mostly consists of stirring and microwaving. Hopefully you’ll be able to duplicate it and make your own versions too. It would be easy to add in rosemary sprigs, or other herbs to make a good exfoliant version too.

It goes without saying, but these make fantastic gifts! This is also a great recipe if you want to try you hand selling at craft shows (check out the post on Crafts to Make and Sell for Profit if you’re interested in learning more about that). I’ve purchased these from vendors at various shows, and they are fabulous!

Find More Soap Recipes

Lush Soap Copycat

LEGO Homemade Soap for Kids

Scarlet Mica Powder Homemade Soap

Filed Under: Recipes Tagged With: Personal Care Recipes

How to Make Bubble Bath

August 14, 2018 By Andrea @ utensi Leave a Comment

This homemade bubble bath recipe is easy to make, and only takes a few ingredients! Your kids will love having their own DIY bubble bath, and your wallet will thank you! via @utensibrand

Homemade Bubble Bath is one of those things that we always need to have a supply of in our home. Our boys will get in the tub and go crazy town with the bubbles! They love them some bubble baths. What can I say? I’ve raised them up the way they should go. 🙂

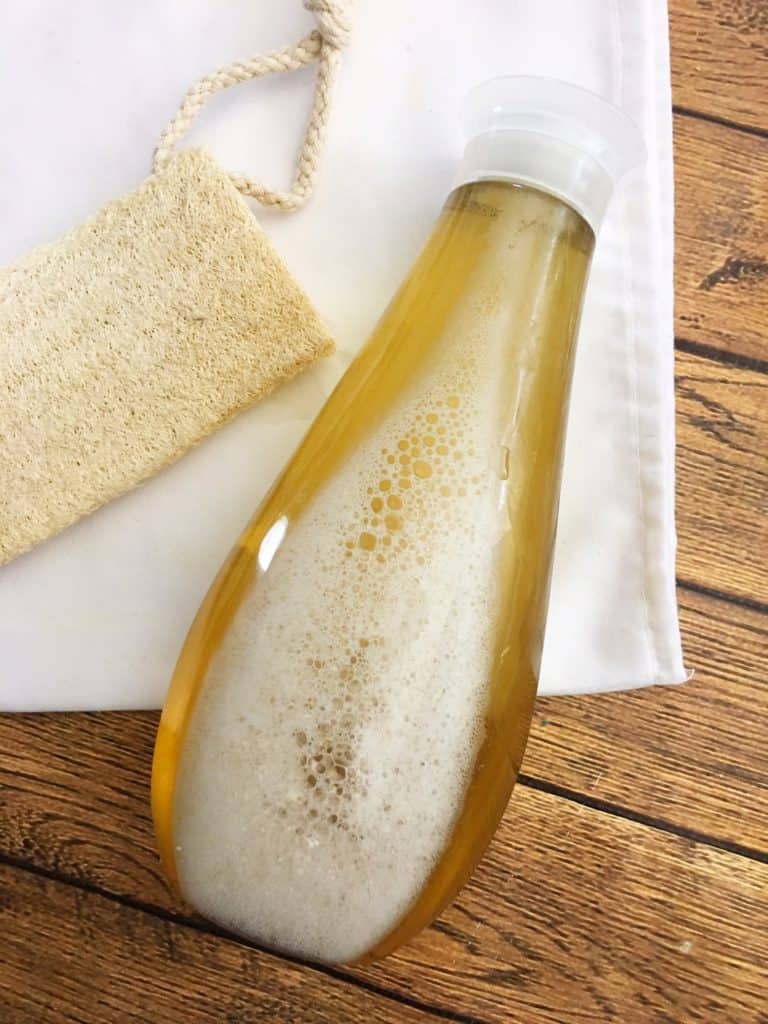
This recipe calls for natural ingredients, most of which you most likely have in your pantry if you love to DIY homemade personal care products. You can store this bubble bath in a mason jar, or these glass water bottles would also work. You can’t go wrong getting a 6-pack since this recipe also makes for a great DIY gift! Reusing an old body wash container can work too. The bottle pictured is a Method body wash bottle.

Homemade Bubble Bath Ingredients

  • 2 cups, Unscented Castile Soap
  • 5 TBS, Distilled Water
  • 1 cup, Vegetable Glycerin
  • 15 drops, Therapeutic Grade Essential Oil (this recipe uses Lavender Oil)
  • Clean Turkey Baster (I have one I use only for DIY personal care products)
  • Body Wash Container

Use our favorite long handle measuring spoons (and on Amazon) to measure and stir the ingredients together without much mess!

How to Make Homemade Bubble Bath

  1. Measure your ingredients and your turkey baster to add your water, Castile soap, and vegetable glycerin to your empty bottle.
  2. Add in your lavender essential oil and shake your bottle lightly to combine your ingredients.
  3. Add a small amount to your running bath water and watch the bubbles form.

This recipe is enough to fill an 18-ounce bottle. Double or quadruple the recipe to make a few batches so you have plenty available if your kids go on bubble overload! Or, as I mentioned they are great gifts if you want to add a ribbon.

Be sure to save this post on Pinterest for later!

More DIY Beauty Products

DIY Body Wash Recipe

Homemade Shower Melts Recipe

Rainbow Lush Copycat Soap

Filed Under: Recipes Tagged With: Personal Care Recipes

Homemade Apple Pie Filling Recipe

July 23, 2018 By Andrea @ utensi Leave a Comment

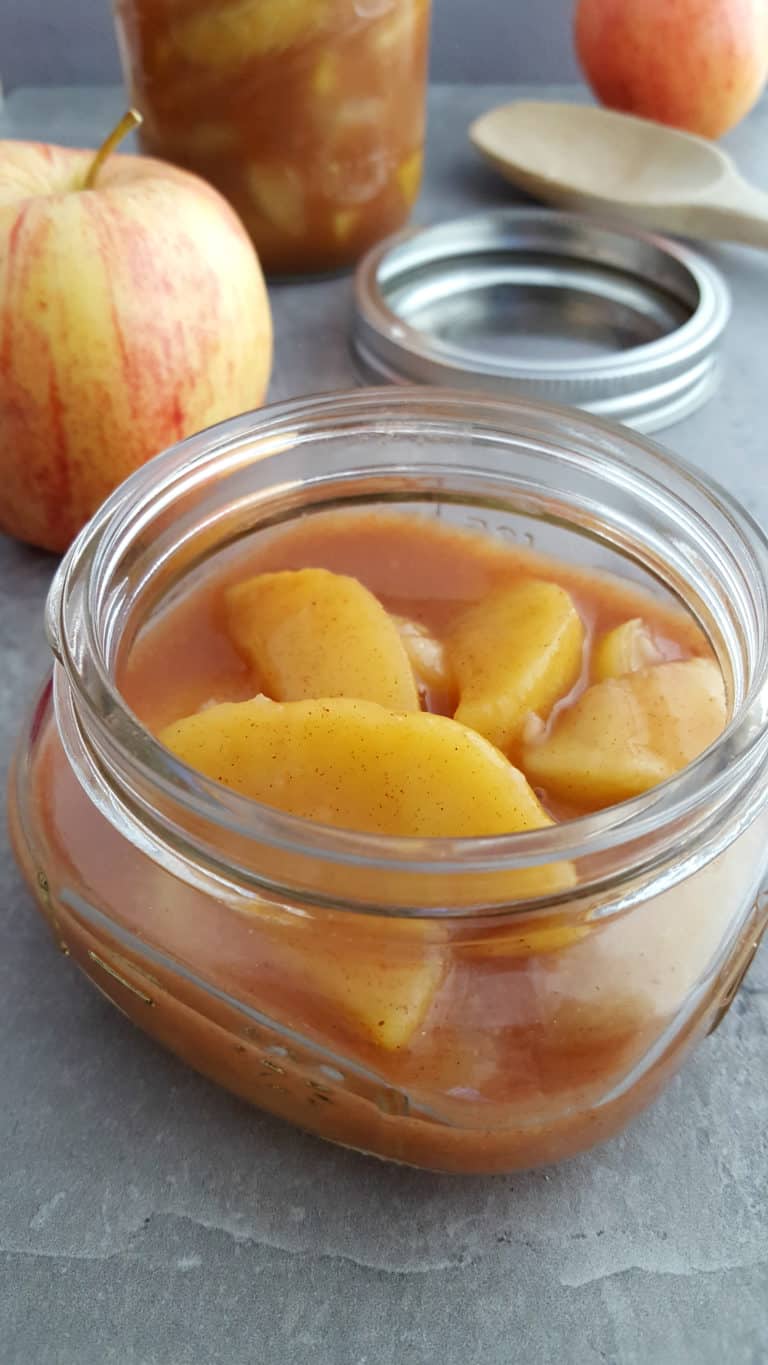
This Apple Pie Filling recipe turns out amazing and is SO EASY! This is a must-make if you are making a homemade apple pie. The apple filling is also freezer-friendly so make a big batch to use in future recipes! via @utensibrand

There is something about a homemade Apple Pie. The crust, the filling, the love and energy that has gone into it. All of those things combined just makes it taste that much better!

This Apple Pie filling recipe won’t disappoint either! While it will take time to prepare, you can make a big batch in advance and even freeze it. This will help some with the time savings but you won’t skimp on the flavor.

Homemade Apple Pie Filling Ingredients

  • 4 cups, Apples (sliced and peeled)
  • ½ cup, Sugar
  • 3 TBS, Cornstarch
  • 2 TBS, Lemon Juice
  • 1 tsp, Cinnamon
  • ¼ tsp, Nutmeg
  • 1 cup, Warm Water

Use our favorite long handle measuring spoons (and on Amazon) to measure and stir the ingredients together without much mess!

Homemade Apple Pie Filling Instructions

  1. In a bowl, add ¾ cup warm water, lemon juice and sliced apples. Toss the apples in the mixture
    to prevent browning.
  2. In a saucepan, combine cornstarch and ¼ cup of water and whisk until blended.
  3. Add sugar, cinnamon and nutmeg to the saucepan, and whisk to combine.
  4. Pour contents from bowl filled with apples into the saucepan and stir. Cook on low heat for 10
    minutes or until apples have softened.
  5. Remove from heat and allow the mixture to cool and thicken before using.

You can also make a homemade pie crust to go along with this, or the store-bought works just as good! This filling would work great in a hand pie too. Make some and freeze so you can throw them in the oven at a moment’s notice!

Be sure to save this post on Pinterest for later!

Filed Under: Recipes Tagged With: Dessert Recipes

Homemade Toilet Bowl Cleaning Discs

March 5, 2018 By Andrea @ utensi Leave a Comment

This homemade toilet bowl cleaner is a simple recipe to prepare. The combination of toilet cleaner ingredients really does make sure your toilet bowl is clean along with smelling fresh thanks to the combination of essential oils! via @utensibrand

I have been teaching our youngest son how to clean the toilet bowl. It’s quite hilarious, actually. They get so grossed out by it and I remind them that is how I feel when I clean *their* bathroom! I’m so glad they can do this job on their own. Our older boys have been responsible for this *dirty* job for a while now.

If you are looking for homemade toilet cleaner, you definitely want to try this DIY Toilet cleaner recipe! These are so simple to prepare. The combination of toilet cleaner ingredients really does make sure your toilet bowl is clean along with smelling fresh thanks to the combination of essential oils!

Homemade Toilet Bowl Cleaner Ingredients

  • ½ cup, Citric Acid
  • 1 cup, Baking Soda
  • ½ cup, Borax
  • 15-20 drops, Therapeutic Grade Essential Oil (this recipe uses Grapefruit and Citrus Oils)
  • Mixing Bowl
  • Muffin Tin or a Square Silicone Mold
  • Spray Bottle of Water

Homemade Toilet Bowl Cleaner Directions

  1. Begin by mixing your dry ingredients (citric acid, baking soda, and Borax) in your mixing bowl. Mix well.
  2. Add in the 15-20 drops of grapefruit or other citrus essential oil of your choice. You might notice some minor fizzing and bubbling when the dry mixture gets wet. This is to be expected. Just continue to briskly stir.
  3. Lightly mist the mixture with your spray bottle. Again you may notice some fizzing. Pack the mixture into the muffin tin or the mold of your choice. You will notice it has sort of a dry dough texture, will be slightly crumbly, but will stick together when packed in well. If not, spray with a little more water.
  4. Pack the mixture in firm and tight. Place the tray or molds in a cool place to dry for 12 hours.
  5. The toilet fizzies should pop out of the tin rather easily. Just pop them out and store them in an air tight container until you are ready to use them.
  6. To use your toilet fizzies, simply drop them into the toilet water, allow them to dissolve, swish with your toilet brush, and flush!

The Borax will act as a powerful cleaning agent while the baking soda helps break down water stains and other grease and grime. The citric acid will cause the bubbling effect and send super cleansing bubbles throughout the bowl, while your citrus essential oil of choice is sure to make your bowl smell great!

Give this easy toilet bowl fizzies recipe a try and see how clean your toilet can get!

Be sure to save this post on Pinterest for later!


DIY Glass Cleaner

Filed Under: Recipes Tagged With: Cleaning Recipes

Easy Peanut Butter Cookies

January 18, 2018 By Andrea @ utensi Leave a Comment

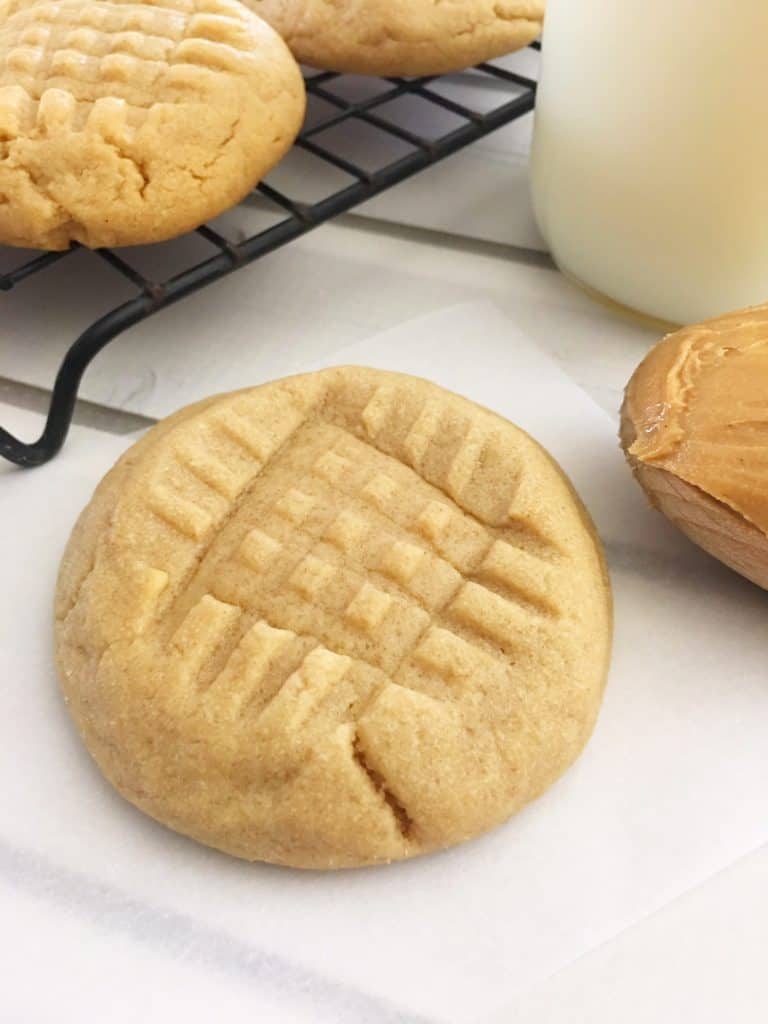
Looking for the best Peanut Butter cookies recipe? These easy Peanut Butter cookies are a classic! The list of ingredients for Peanut Butter cookies including simple everyday pantry items to make these easy cookies! via @utensibrand

Looking for the best Peanut Butter cookies recipe? Look no further! These Peanut Butter cookies are a classic!

They are made with simple ingredients. I almost always have everything to make a batch in my pantry. Usually when I’m missing an ingredient it’s actually the sugar. We just don’t add a lot of refined sugar to everyday recipes, so I rarely have much of it on hand.

I’m always looking for easy cookies to make too. These simple peanut butter cookies are about as easy as they come! You really only need to get one bowl dirty to prepare these. That is my kinda recipe!!

Ingredients for Peanut Butter Cookies

  • 1/2 cup, Unsalted Butter (softened)
  • 3/4 cup, Light Brown Sugar
  • 1/3 cup, Granulated Sugar
  • 1 Egg
  • 1 TSP, Vanilla Extract
  • 3/4 cup, Creamy Peanut Butter
  • 1 1/2 cups, All-Purpose Flour
  • 1/2 tsp, Baking Soda
  • 1/2 tsp, Salt

Use our favorite long handle measuring spoons (and on Amazon) to measure and stir the ingredients together without much mess!

Easy Peanut Butter Cookies Directions

  1. Preheat your oven to 350° and line a couple baking sheets with parchment paper or a silicone baking mat.
  2. In a large mixing bowl combine your softened butter and your sugars and mix using a hand or stand mixer.
  3. Mix in your peanut butter and then lightly mix in your egg and vanilla.
  4. Then mix in your flour, baking soda and salt.
  5. Form your dough into golf sized balls and place on your lined baking sheet.
  6. Use the end of a fork to press a cross cross pattern onto the top of your cookies (this will flatten them about halfway).
  7. Bake your cookies for 11-13 minutes.

Enjoy! You can’t beat old fashioned peanut butter cookies! You can prepare these in advance and refrigerate the dough. You can also freeze the cookie balls and thaw/bake when you have a sweet craving.

If you’re craving more sweetness and decadence, drizzle some melted chocolate over the top of each cookie. Nom nom!!

Be sure to save this post on Pinterest for later!

Looking for the best Peanut Butter cookies recipe? These easy Peanut Butter cookies are a classic! The list of ingredients for Peanut Butter cookies including simple everyday pantry items to make these easy cookies!

Nutella Stuffed Peanut Butter Cookies

Monster Cookie Bars Recipe

Filed Under: Recipes Tagged With: Cookie Recipes

Glittery Gem Chocolates Recipe

December 4, 2017 By Andrea @ utensi Leave a Comment

These chocolates are shaped like gems and sprinkle with glitter! Such a fun treat for a bridal or baby shower, or even a festive Christmas treat for guests.

These Gem Chocolates are just fun! Well, they taste pretty darn good too but how could chocolate not taste good?! These would be perfect to make for a special party, or perhaps a wedding or baby shower. Use different colors of melting candies depending on the party’s colors.

You could also make some for the holidays with blue and green chocolates. Use silver and gold edible glitter to make a fun, festive party goodie bag!

Glittery Gem Chocolates Ingredients

  • 1 cup, Wilton Pink Melting Candy
  • 1 cup, Wilton White Melting Candy
  • Pink Edible Glitter
  • Wilton Decorating Bags
  • Wilton Gems Mold

Glittery Gem Chocolates Instructions

  1. Place your pink and white melting candy in separate bowls and microwave each separately for 2-3 minutes, stirring every 30 seconds until melted.
  2. Scoop your pink and white melted candy into 2 separate decorating bags and cut a small tip off the end.
  3. Rub a tiny bit of edible glitter inside the gem molds.
  4. Squeeze your colored melted candy into each game mold and carefully pick up the mold and tap it onto the counter several times to prevent air bubbles.
  5. Transfer your gems to the freezer for 20 minutes and carefully press up on the bottom of each gem to remove them.

I’d love to see pictures of your glittery gems so please share them on our Facebook page if you try this recipe!

Be sure to save this post on Pinterest for later!

Use our favorite long handle measuring spoons to measure and stir the ingredients together without much mess!

These chocolates are shaped like gems and sprinkle with glitter! Such a fun treat for a bridal or baby shower, or even a festive Christmas treat for guests.

[tasty-recipe id=”618″]

Filed Under: Recipes Tagged With: Dessert Recipes

Monster Cookie Bars Recipe

November 30, 2017 By Andrea @ utensi Leave a Comment

 This Monster Cookie Recipe will make your little cookie monsters happy!! Make cookie bars for faster prep and easier cleanup!

Who doesn’t love a cookie bar with a little bit of everything amazing thrown in? I know I can’t!

This Monster Cookie Bars Recipe is super easy to make since you add everything into a pan. A pan always seems faster to me. Let the kids decide what “mix-ins” they want to include with each new batch. The sky is really the limit!

Monster Cookie Bars Ingredients

  • 1 cup, Brown Sugar (packed)
  • 1/2 cup, Butter (softened)
  • 1 Egggg
  • 2 tsp, Vanilla Extract
  • 1 1/4 cups, Flour
  • 1 tsp, Baking Powder
  • 3/4 cup, Mini M&M’s
  • 9 Oreo Cookies (semi-crushed)
  • 1/4 cup, Pretzels (semi-crushed)

Monster Cookie Bars Directions

  1. Preheat your oven to 350° and grease a 8×8″ baking pan with a non stick cooking spray
  2. Use a hand mixer to beat your brown sugar and butter together
  3. Mix in your egg and vanilla extract
  4. Then mix in your flour and baking powder
  5. Fold in your M&M’s, Oreos, and pretzels
  6. Press your cookie dough into the bottom of your greased pan
  7. Bake for 25 minutes, let cool, and slice into squares

I hope your little cookie monsters enjoy these!

This Monster Cookie Recipe will make your little cookie monsters happy!! Make cookie bars for faster prep and easier cleanup!

[tasty-recipe id=”611″]

Filed Under: Recipes Tagged With: Cookie Recipes

Pour and Melt LEGO Soaps

October 30, 2017 By Andrea @ utensi Leave a Comment

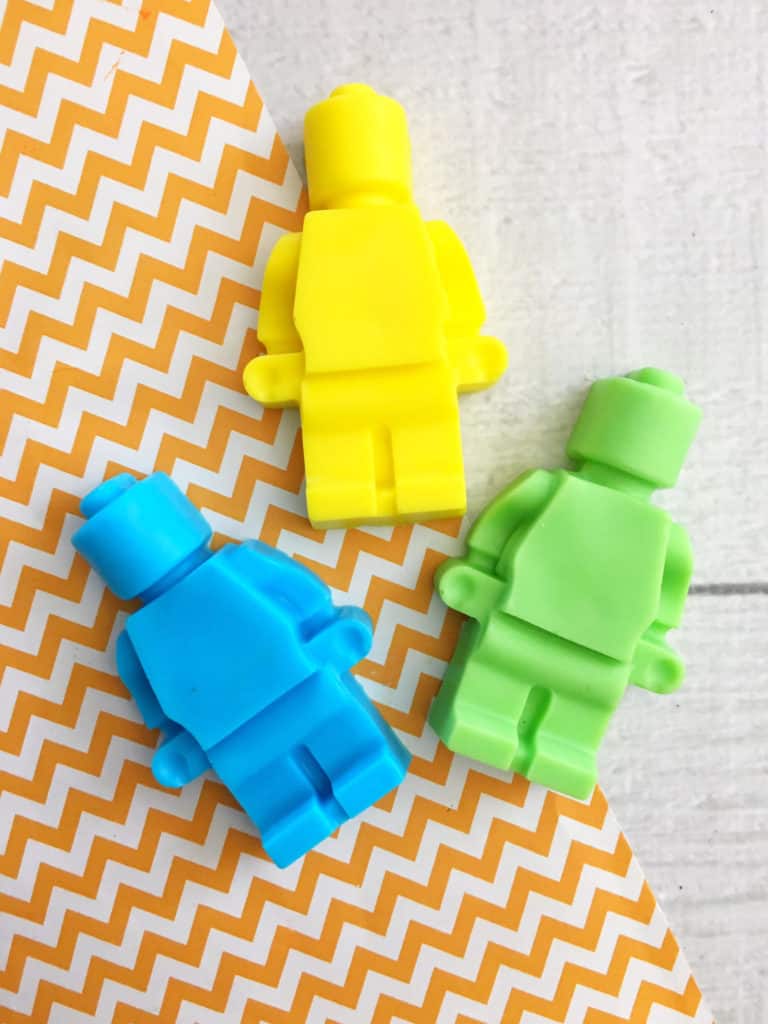
Do you have a LEGO fan in the house? Make these pour and melt soaps with a LEGO mold and they are guaranteed to enjoy hand washing time!

I’m pretty sure most parents will agree that these Legos are the best kind of Legos you can have! No fear of LEGO foot injuries, or at least if it happens it won’t hurt near as bad!

You can easily whip up a batch of these with the kids. Or, these would make “handy” gifts for stockings or even party favors. They are easy enough to make and take similar ingredients if you’ve made any of our previous homemade personal care items.

Pour and Melt LEGO Soaps Supplies

  • Cocoa Butter Block Soap
  • Soap Colorant (blue, pink and yellow)
  • Soap Scent (vanilla or your choice)
  • Large Lego Man Silicone (like this one)
  • Measuring spoons
  • Glass measuring cup

Pour and Melt LEGO Soaps Directions

  1. Cut your soap block into about 10 large ice cube size pieces.
  2. Place about 3 soap cubes into your measuring cup.
  3. Microwave your soap for about 1-2 minutes, stirring every 30 seconds until melted.
  4. Mix in a few drops of your colorant.
  5. Add a 1/4 teaspoon of your soap scent and a few drops of your sweet almond oil and mix.
  6. Carefully place on a flat surface in the freezer for 20 minutes.
  7. Carefully stretch the sides of your mold and push up on the bottom to remove your soaps.
  8. Now make another color.

Keep these little Lego guys in a mason jar by the sink. They will keep for several months, although our soaps never last that long!

Be sure to save this post on Pinterest for later!

wooden measuring spoons long handles utensi

Use our long handle measuring spoons to measure and stir this recipe.

Do you have a LEGO fan in the house? Make these pour and melt soaps with a LEGO mold and they are guaranteed to enjoy hand washing time!

Filed Under: Crafts Tagged With: Personal Care Recipes

Mickey Mouse Cookies (homemade and easy!)

May 23, 2017 By Andrea @ utensi Leave a Comment

Homemade Mickey Mouse Cookies

Do you have a Mickey Mouse or Disney lover in the house? These cookies will make them SO HAPPY! These would be perfect treats to make for a trip countdown to Disney!

Mickey Mouse Cookies Ingredients

  • 3/4 cup, Butter (softened)
  • 3/4 cup, Granulated Sugar
  • 1 TBS, Almond Extract
  • 1 Egg
  • 2 cups, All-Purpose Flour
  • Pinch Salt
  • Miniature M&M’s
  • Black Gel Icing
  • Wilton Red Candy Melts (found here)
  • 3″ Circle Cookie Cutter
  • 1″ Circle Cookie Cutter

Mickey Mouse Homemade Cookies

Mickey Mouse Cookies Directions

  1. Preheat your oven to 325 degrees and line a baking sheet with parchment paper.
  2. Use a hand or stand mixer to beat your butter and sugar together.
  3. Mix in your almond extract and egg.
  4. Mix in your flour and salt.
  5. Form your dough into a ball and roll it out.
  6. Use your 3″ circle to cut your shapes out.
  7. Then use your 1″ to cut out small circle ears by placing the cookie cutter inside the cut out circle to make 1″ circles that fit onto your larger cut out circle.
  8. Place two 2 1″ circles onto the top of your larger circle for ears and carefully roll your dough Mickey Mouse head out so the ears stick to the head.
  9. Place on your baking sheet and bake for 8-10 minutes depending on the thickness of your cookie.
  10. Heat 1 cup red candy melts in a microwave safe dish for 2-3 minutes, stirring every 30 seconds until melted.
  11. Once your cookies cool dip the bottom on your cookie into the red chocolate and place onto the parchment paper and let harden.
  12. Use your black gel icing to draw a straight line across the top of the red chocolate and place two red M&M’s onto the black line.

Let me know if you try them, and I would love to see pics with you and the kids with them too!

wooden measuring spoons long handles utensi

Use our long handle measuring spoons to measure and stir this recipe.

These homemade cookies are inspired the main mouse - MICKEY! So easy your kids can help - they will love 'em too!

Filed Under: Recipes Tagged With: Cookie Recipes, Dessert Recipes

  • 1
  • 2
  • 3
  • …
  • 5
  • Next Page »

Get Social


Facebook
Instagram
Pinterest
Twitter

Sign Up for Our Newsletter

Get Exclusive Promotions!

Copyright © 2022, utensi ™ | [email protected]